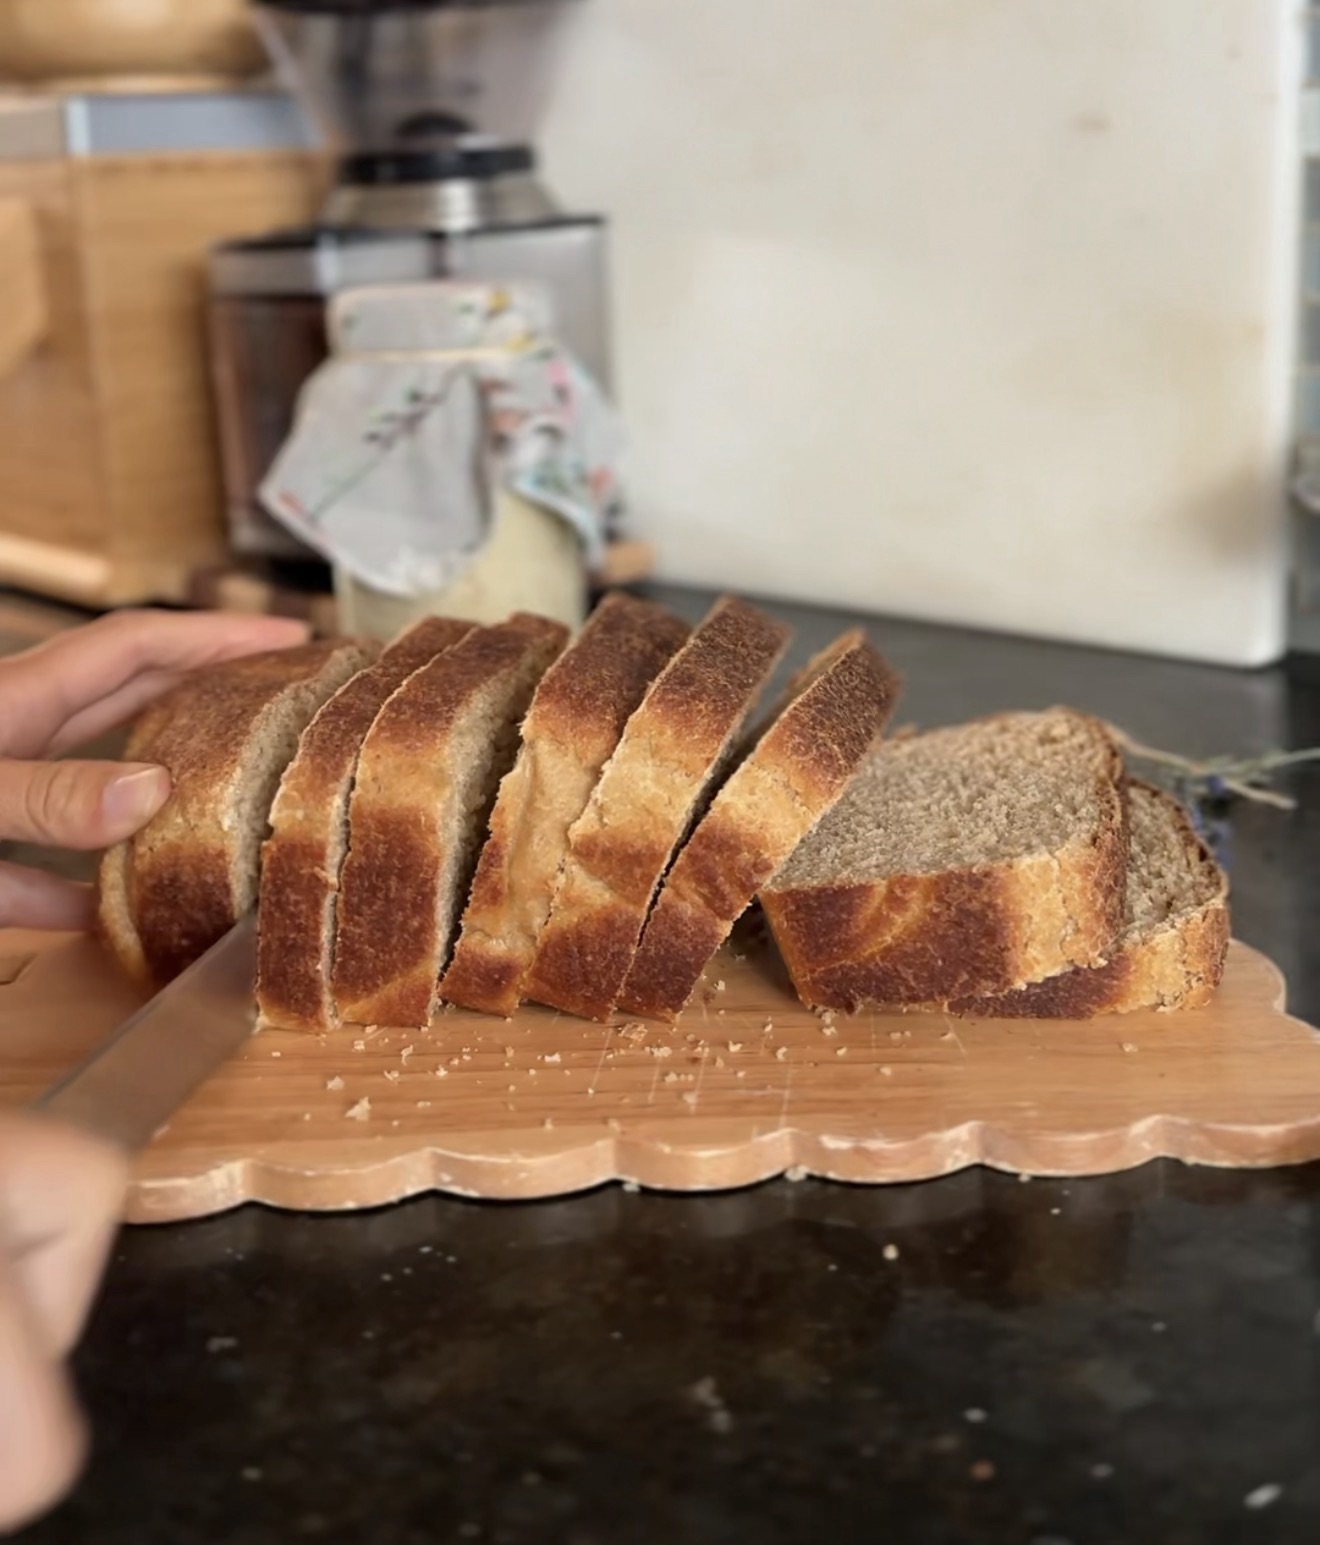

If you’ve ever wondered whether you can make a 100% fresh-milled sourdough sandwich bread that’s soft enough for everyday sandwiches, the answer is yes!
One of the biggest misconceptions about baking with freshly milled whole wheat flour is that your bread has to be dense or heavy. With the right ingredients and a few simple techniques, you can create a loaf that’s incredibly soft, fluffy, and perfect for everything from toast to school lunches.
After testing different hydration levels, mixing methods, and fermentation times, this has become my family’s favorite fresh milled sourdough sandwich bread recipe. It’s naturally sweetened with honey, enriched with butter, and made entirely with 100% freshly milled hard white wheat flour—no white flour needed.
Whether you’re new to milling your own grain or you’ve been baking with fresh flour for years, I think you’ll be surprised by just how tender this loaf turns out.
Why You’ll Love This Recipe
✔ Made with 100% freshly milled flour
✔ Naturally fermented with sourdough
✔ Soft enough for sandwiches
✔ Kid-approved texture
✔ Naturally sweetened with honey
✔ No commercial yeast
✔ Free of preservatives and dough conditioners
Why I Use Freshly Milled Flour

One of my favorite ways to nourish my family is by baking with freshly milled whole grains.
Unlike store-bought flour, freshly milled flour still contains the bran, germ, and naturally occurring oils that are often removed during commercial processing. Many home bakers also enjoy the richer flavor and aroma that come from milling flour just before baking.
Because freshly milled flour absorbs more water than refined flour, this recipe includes a 1-hour fermentolyse. Giving the flour time to fully hydrate helps soften the bran and encourages better gluten development, resulting in a much softer loaf.
The Secret to Soft Fresh-Milled Sourdough
If you’ve struggled with dense 100% whole wheat sourdough bread, you’re not alone.
There are four things that make the biggest difference in this recipe:
1. Freshly Milled Hard White Wheat
Hard white wheat creates a lighter color and milder flavor than hard red wheat while still giving you all the benefits of whole grain flour.
2. A One-Hour Fermentolyse
Allowing the flour, starter, milk, and water to rest before kneading gives the bran time to fully hydrate and makes the dough much easier to develop.
3. Honey, Butter & Egg
These simple ingredients enrich the dough naturally, creating the soft texture most people want in a sandwich loaf without relying on commercial dough improvers.
4. Let the Dough Tell You When It’s Ready
Instead of baking by the clock, watch your dough. Learning to recognize proper fermentation is one of the biggest skills that will improve your sourdough baking.

Ingredients
Fermentolyse
210 g active sourdough starter
430 g freshly milled hard white wheat flour, finely milled
175 g warm filtered water
75 g whole milk
Add After the Fermentolyse
42 g unsalted butter, softened
55 g raw honey
1 large egg
8 g fine sea salt
How to Make 100% Fresh-Milled Sourdough Sandwich Bread
Step 1: Fermentolyse
In the bowl of a stand mixer, combine the sourdough starter, freshly milled flour, warm water, and milk. Mix just until no dry flour remains.
Cover and allow the dough to rest for 1 hour.
Step 2: Mix the Dough
Add the honey, egg, and sea salt to the dough.
Using the dough hook on a KitchenAid mixer (Speed 2), mix for about 5 minutes.
With the mixer running, add the softened butter one tablespoon at a time, allowing each addition to fully incorporate before adding the next.
Continue mixing another 6–8 minutes, or until the dough is smooth, elastic, and mostly pulls away from the sides of the bowl.
Step 3: Check Gluten Development
Stretch a small piece of dough between your fingers. The dough should stretch fairly thin before tearing. Freshly milled dough won’t create a perfectly transparent windowpane like white flour, but it should feel smooth, elastic, and noticeably stronger than when you first mixed it.
Step 4: Bulk Fermentation
Transfer the dough to a lightly buttered bowl and cover.
Option 1: Allow the dough to rise at room temperature until it has increased by about 50–75%, approximately 5–7 hours.
Option 2 (My Favorite): Allow the dough to rise at room temperature for 2–3 hours, then refrigerate overnight.
Step 5: Shape

Butter a loaf pan.
Turn the dough onto a clean work surface and gently press it into a rectangle about the width of your loaf pan.
Roll the dough tightly into a log, sealing the dough as you roll to create surface tension.
Pinch the seam closed and place the loaf seam-side down into the prepared loaf pan.
Step 6: Final Rise

Cover the loaf and allow it to rise until it reaches the top edge of the loaf pan.
To check if it’s ready, gently press the dough with a lightly floured fingertip.
- If it springs back immediately, allow it to rise longer.
- If it slowly springs back and leaves a slight indentation, it’s ready to bake.
- If the indentation remains and doesn’t recover, the dough has likely over-proofed.
The loaf should feel light, soft, and pillowy before baking.
Step 7: Bake
Preheat the oven to 375°F.
Bake for 35 minutes, or until the loaf is golden brown and reaches an internal temperature of 200–205°F.
Immediately brush the top with melted butter.
Allow the bread to cool in the pan for 20–30 minutes, then transfer to a wire rack to cool completely.

The Best 100% Fresh-Milled Sourdough Sandwich Bread
This soft and fluffy 100% fresh-milled sourdough sandwich bread is made with freshly milled hard white wheat flour, honey, butter, and an active sourdough starter. Naturally leavened and perfect for sandwiches, toast, and everyday baking, it’s a wholesome loaf your whole family will love.
Ingredients
- (Fermentolyse)
- 210 g active sourdough starter
- 430 g freshly milled hard white wheat flour, finely milled
- 175 g warm filtered water
- 75 g whole milk
- (Add After the Fermentolyse)
- 55 g raw honey
- 1 large egg
- 8 g fine sea salt
- 42 g unsalted butter, softened
Instructions
Step 1: Fermentolyse
In the bowl of a stand mixer, combine the sourdough starter, freshly milled flour, warm water, and milk. Mix just until no dry flour remains.
Cover and allow the dough to rest for 1 hour.
Step 2: Mix the Dough
Add the honey, egg, and sea salt to the dough.
Using the dough hook on a KitchenAid mixer (Speed 2), mix for about 5 minutes.
With the mixer running, add the softened butter one tablespoon at a time, allowing each addition to fully incorporate before adding the next.
Continue mixing another 6–8 minutes, or until the dough is smooth, elastic, and mostly pulls away from the sides of the bowl.
Step 3: Check Gluten Development
Stretch a small piece of dough between your fingers. The dough should stretch fairly thin before tearing. Freshly milled dough won’t create a perfectly transparent windowpane like white flour, but it should feel smooth, elastic, and noticeably stronger than when you first mixed it.
Step 4: Bulk Fermentation
Transfer the dough to a lightly buttered bowl and cover.
Option 1: Allow the dough to rise at room temperature until it has increased by about 50–75%, approximately 5–7 hours.
Option 2 (My Favorite): Allow the dough to rise at room temperature for 2–3 hours, then refrigerate overnight.
Step 5: Shape
Butter a loaf pan.
Turn the dough onto a clean work surface and gently press it into a rectangle about the width of your loaf pan.
Roll the dough tightly into a log, sealing the dough as you roll to create surface tension.
Pinch the seam closed and place the loaf seam-side down into the prepared loaf pan.
Step 6: Final Rise
Cover the loaf and allow it to rise until it reaches the top edge of the loaf pan.
To check if it’s ready, gently press the dough with a lightly floured fingertip.
- If it springs back immediately, allow it to rise longer.
- If it slowly springs back and leaves a slight indentation, it’s ready to bake.
- If the indentation remains and doesn’t recover, the dough has likely over-proofed.
The loaf should feel light, soft, and pillowy before baking.
Step 7: Bake
Preheat the oven to 375°F.
Bake for 35 minutes, or until the loaf is golden brown and reaches an internal temperature of 200–205°F.
Immediately brush the top with melted butter.
Allow the bread to cool in the pan for 20–30 minutes, then transfer to a wire rack to cool completely.
Notes
Freshly milled flour absorbs more water than store-bought flour, so avoid adding extra flour too quickly. If the dough feels slightly sticky after mixing, give it a few minutes to continue hydrating before making adjustments.
This recipe was developed using freshly milled hard white wheat. If using hard red wheat, expect a slightly heartier flavor and a darker loaf.
Notes
Freshly milled flour absorbs more water than store-bought flour, so avoid adding extra flour too quickly. If the dough feels slightly sticky after mixing, give it a few minutes to continue hydrating before making adjustments.
This recipe was developed using freshly milled hard white wheat. If using hard red wheat, expect a slightly heartier flavor and darker loaf.
Equipment
- Grain mill
- Digital kitchen scale
- Stand mixer with dough hook
- 9×5-inch loaf pan
- Instant-read thermometer
- Cooling rack
Keywords
fresh milled sourdough bread, fresh milled sandwich bread, 100% fresh milled flour, freshly milled wheat bread, whole wheat sourdough sandwich bread, honey butter sourdough, homemade sandwich bread, sourdough sandwich loaf
Leave a Reply